Running Shoe Tests and Lacing Patterns for Foot Pain
Do you have foot pain when you exercise?
Learn why motion control in running shoes can affect your performance, and how to tie your laces to reduce foot pain.
Evolution of the Running Shoe
The first athletic performance shoe was the running shoe, made in the 19th Century. However, with the start of the first Olympic Games in 1896, there was a need for lighter, more flexible shoes that could provide better grip. Shoe technology has come a long way since then. With the large variety of athletic shoes available today, it can be hard to know what to look for! Whether you are in the market for a new running shoe or want to put your current running shoes to the test, here are some things to look out for.
3 Motion Control Tests for your next pair of Running Shoes
Motion control limits excessive foot movement by providing sufficient support and stability in your shoes. Do your current running shoes pass these four motion control tests?
The Dish Rag Test

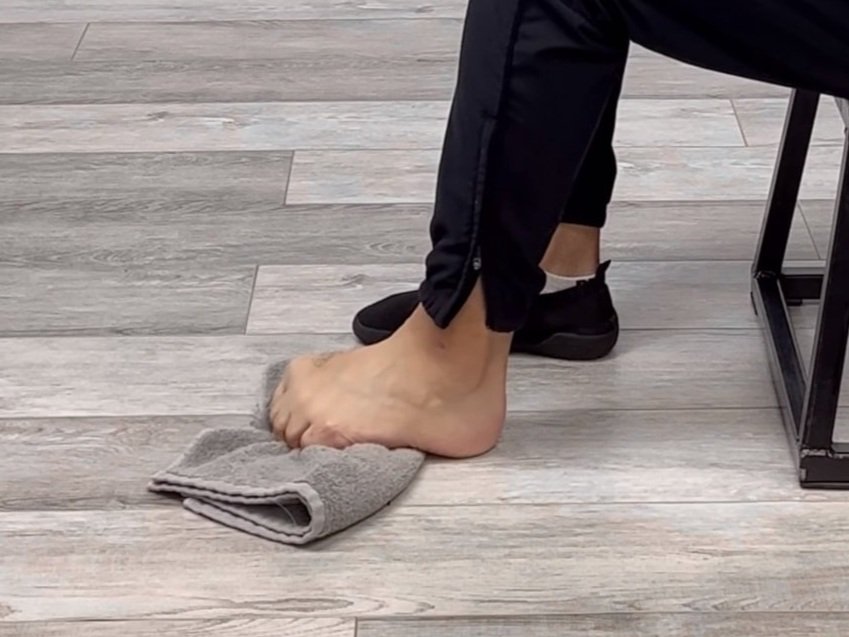
This tests for torsional rigidity of the show. To perform this test, hold both ends of your shoe and twist it in opposite directions like a dishrag. If you can completely twist the shoe, the shoe may have poor midfoot support. This may have implications down the line due to excessive overpronation due to the increased movement in the area during midstance. Your shoe should be difficult to twist the shoe and should allow only a small amount of torsion.
2. The Pinch Test

This test assesses the rigidity of the material that wraps around the back of the foot, called the “heel counter”. Heel rigidity is important because poor stabilization in the rearfoot will translate into poor stability in the forefoot. To perform this test, pinch the material at the back of your shoe where your shoe would touch your ankle. There should be little to no give during this test. A rigid heel counter provides proprioceptive feedback of where your rear foot is in space, and thus helps your body fine tune the recruitment of the small stabilizing muscles of the foot.
3. Fold Test

This test looks at the amount of bend the shoe allows in the behind the heads of the metatarsals. To perform this test, try to fold your shoe in half through the width of the shoe. This is testing the “flexion” of the shoe and is an indicator of the rigidity of the sole. When running, a certain amount of metatarsal extension is needed for toe-off and forward propulsion, thus some degree of motion is needed in the shoe. However, if you can fold your shoe more than 30˚ of flexion, your shoe may be too weak and allow for excessive movement. The shoe should feel rigid and should only bend where the ball of your feet would be.
Special Lacing Techniques
Unless your shoes have another closure type, you probably haven’t given much thought about how you tie your laces. In addition to the motion control tests, you can adjust your lacing system to optimize your performance and comfort. Did you know that different lacing techniques can be used to address foot pain or shoe performance? Whilst the original lacing provides general comfort and support, you can re-lace your shoes to provide relief for some pain patterns, and better suit the anatomy of your foot.
Pain Across the Top of the Foot
Window lacing alleviates pressure on the top of the foot. This technique allows you to customize the placement of the window so that there is less pressure where you feel the pain.
Unlace your shoe until the eyelet that is just below the pressure point.
Re-lace the shoe by going directly up to the next eyelet on the same side.
Continue re-lacing your shoes in a normal crossing pattern.

Toe Pain
If you experience pinching around your toes, or experience black toenails, then you may want to relieve the pressure in the toe box. “Toe-Cap Lacing” exerts dorsal pressure on the toe box, helping to open the space and give the toes more room.
Lace the first eyelet on the side of the big toe, and the last eyelet on the opposite side.
Pull the pinky toe side of the laces so that it is 4 inches longer.
Continue lacing the pinky toe side of the laces in a cross pattern through the rest of the eyelets.

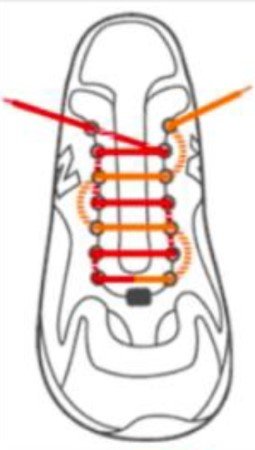
High Arches
High arched feet have difficulty absorbing shock efficiently due to reduced mobility in the midfoot. Perpendicular lacing alleviates focal pressure points in the midfoot to accommodate the space taken up by the high arches. This pattern can help relieve the stretching or tearing association felt by adding stabilization to the area.
Thread the ends of the laces through the first two eyelets on either side.
Feed one side into the eyelet directly vertical, and then feed it through the eyelet on the opposite side at the same level.
With the opposite end of the lace, thread it to the eyelet two above the first eyelet on the same side, and then feed it through the eyelet on the opposite side at the same level.
Then feed either ends underneath the vertical lace on the opposite side, before continuing the end through the eyelet above.
Repeat this pattern until the last set of eyelets.
Heel Slippage
Excessive heel slippage in your shoe can not only be annoying, but also lead to heel blisters, and wear out the back of your shoe. “Lock Lacing” (also known as the “Runner’s Loop”) is a lacing pattern that reduces the movement in your shoe by preventing your laces from loosening.
Laces shoes in a normal cross pattern until the second last eyelet.
Thread either end through the last eyelet directly above so that it comes out on the inside of the shoe.
Cross the laces and thread them through the vertical lace on the opposite side.

Remember, lacing adjustments aren’t a substitute for proper fitting shoes, or sports specific shoes. Appropriate footwear is key for optimal performance, comfort, and injury reduction. There are many more factors that play into your running performance. Having shoes with adequate support for your style of training and making sure that you are wearing them correctly is a good start to optimizing your running performance. Gait analysis, running technique, diet, and strength training can all be used to improve your running performance, and should be considered when creating your training plan. Although proper running shoes won’t solve all your running problems, having enough motion control, and an appropriate lacing pattern is a step in the right direction.

Author: Dr. Angeline Foot
Dr. Angie is a chiropractor in Markham that believes in understanding each patient as a whole person, rather than just focusing on the site of the pain. When she’s not practicing at the clinic, you can find her rock climbing, taking a Peloton class, or spending time with loved ones.
Recent articles


Exercise videos